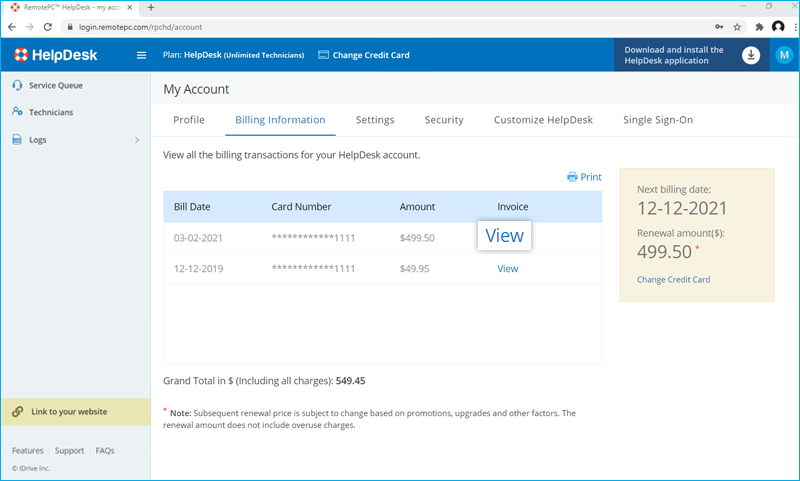
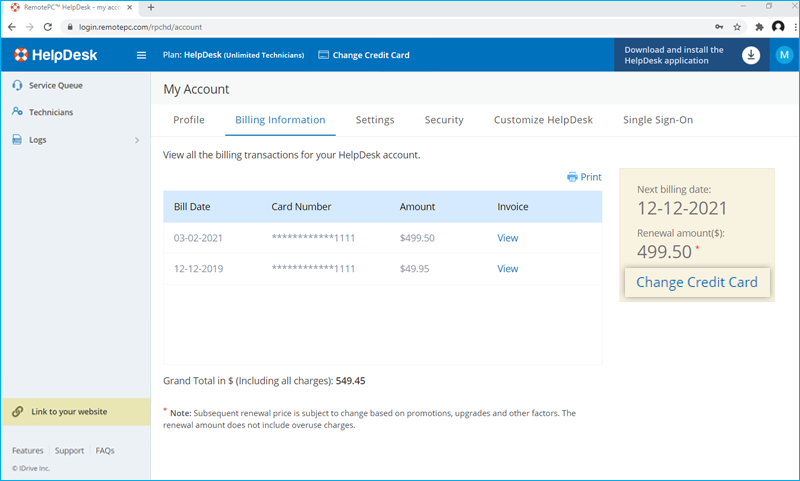
You can view and print the billing transactions and invoices of your HelpDesk account easily.
To view bills and invoices,
- Log in to HelpDesk via web browser.
- Click username displayed on the top-right corner and click 'My Account'.
- '청구 정보'로 이동하여 필요한 청구서에 대해 '보기'를 클릭합니다.
- 청구서를 인쇄하려면 '청구 정보' 탭에서 '인쇄'를 클릭합니다.

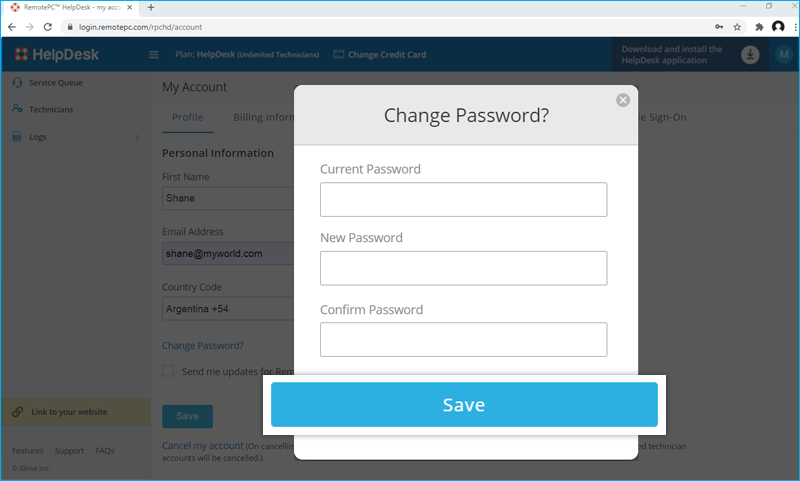
계정 비밀번호를 변경하려면 다음과 같이 하세요,
- Log in to HelpDesk via web browser.
- Click username displayed on the top-right corner and click 'My Account'.
- Click 'Change Password?' under 'Profile'. The 'Change Password?' window appears
- Enter your current password, new password and confirm it.
- '저장'을 클릭합니다.
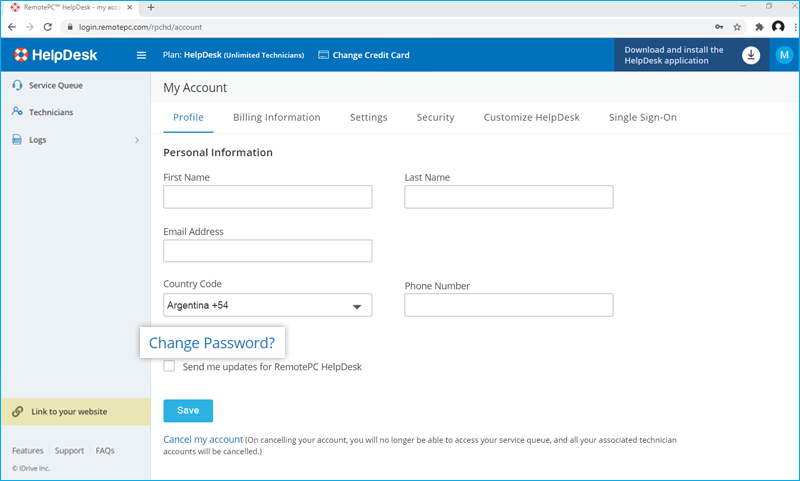
프로필을 업데이트하려면 다음과 같이 하세요,
- Log in to HelpDesk via web browser.
- Click username displayed on the top-right corner and click 'My Account'.
- In the 'Personal Information' section under 'Profile', modify your details - name, email address, phone number and password.
- '저장'을 클릭합니다.

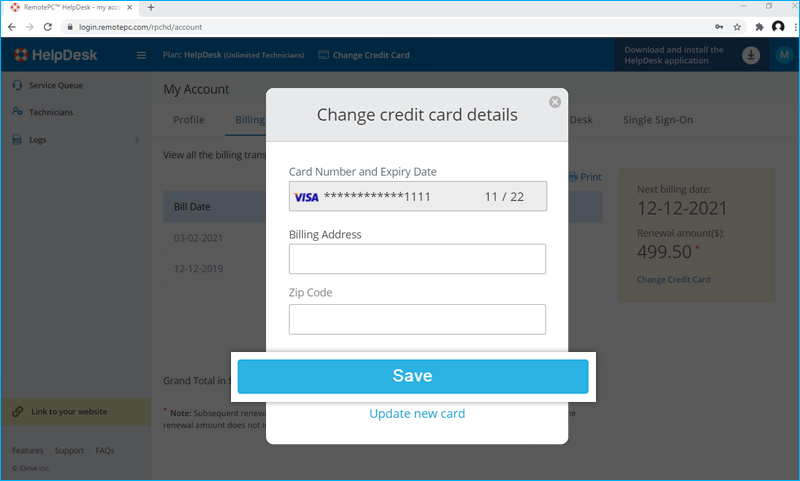
I am unable to use my existing credit card to make a payment towards the HelpDesk account renewal. Why?
This problem may arise due to the following reasons while renewing your HelpDesk account:
- 신용카드 번호와 만료일이 정확하지 않을 수 있습니다.
- The online authorization system may fail certain valid credit cards outside US in the address verification test.
If any payment is outstanding against your HelpDesk account, a pop-up appears once you log in.
- Click 'Change Credit Card'.
- On the 'Change credit card details' popup, edit your credit card details. You can also add a new card by clicking 'Update new card'.
- '저장'을 클릭합니다.
Yes, you can make payments for HelpDesk subscriptions, upgrades, and recurring charges via PayPal. By making a payment through PayPal, you will be enrolling it as the default payment method for subsequent renewals. If you want to enroll your credit card for future renewals, click the 'Add Credit Card' link on the application header and save your card details.

If your business is based in the EU region, you can update your VAT ID information for your HelpDesk account.
부가가치세 ID를 추가합니다,
- Log in to HelpDesk via web browser.
- Click username displayed on the top-right corner and click 'My Account'.
- '청구 정보' 섹션에서 VAT ID를 입력하고 '업데이트'를 클릭합니다.
참고:
- 부가가치세는 위치 기반이므로 선택한 국가에 해당되는 경우에만 계정의 '청구 정보' 섹션에 해당 필드가 표시됩니다.
- VAT ID updated to your account will be validated by HelpDesk.
For information on HelpDesk VAT number, contact us via email at [email protected].
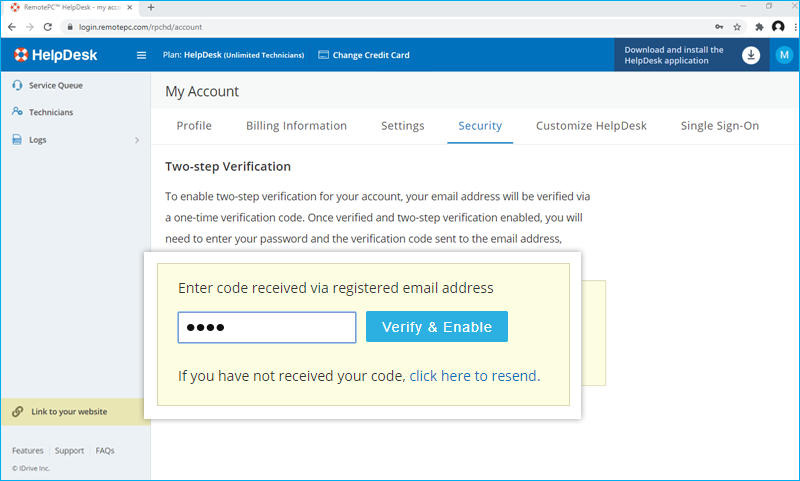
The two-step verification process enhances the security of your account and prevents access by unauthorized parties. Once two-step verification is enabled, in addition to your password, you will need to enter a verification code sent to your registered email address, while logging in to HelpDesk.
To enable two-step verification,
- Log in to HelpDesk via web browser.
- Click your username at the top-right of the screen.
- '내 계정'을 선택하고 '보안' 탭으로 이동합니다.
- Click 'Enable Two-step Verification'.
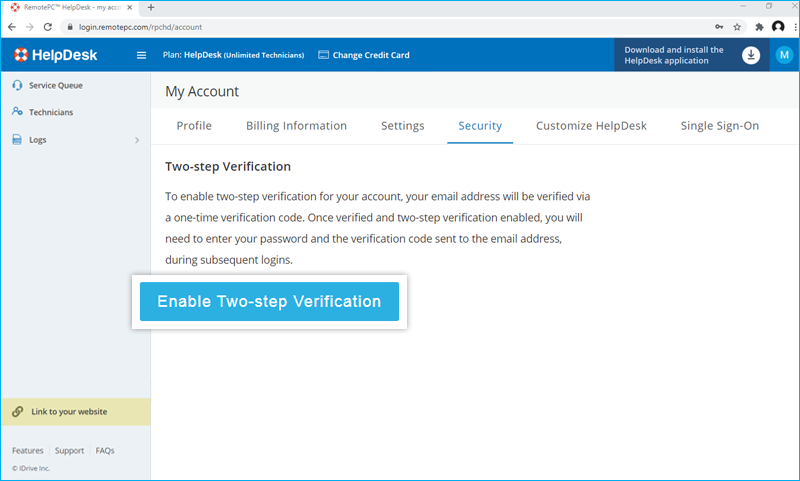
- Enter the verification code sent to your registered email address and click 'Verify & Enable'.
To login after two-step verification is enabled,
- On the login screen, enter your username and password and click 'Login'. You will be prompted to enter a verification code sent to your email address.
- 코드를 입력하고 '확인'을 클릭합니다.
Yes, you can enable two-step verification for new and existing technicians.
For new technicians:
While adding a new technician you can select the 'Enable two-step verification' checkbox in the 'Add Technician' popup.
For existing technicians:
You can open the 'Edit Technician Roles' popup by clicking  displayed against an existing technician, then select the 'Enable two-step verification' checkbox and click 'Save'.
Once you have enabled two-step verification for your technicians, on login they will be asked to verify their email address via OTP.
After the verification process is complete, they will need to enter a verification code sent to their registered email address during subsequent logins.
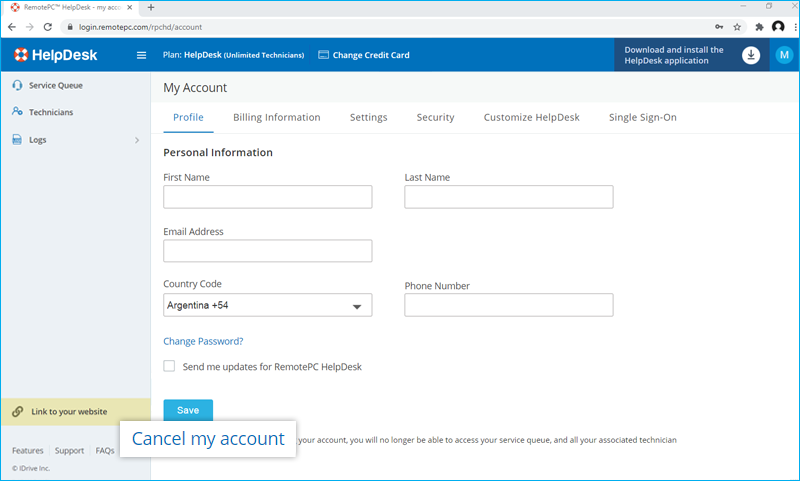
Yes, you can cancel your HelpDesk account at any time.
To cancel,
- Log in to HelpDesk via web browser.
- Click username displayed on the top-right corner and click 'My Account'.
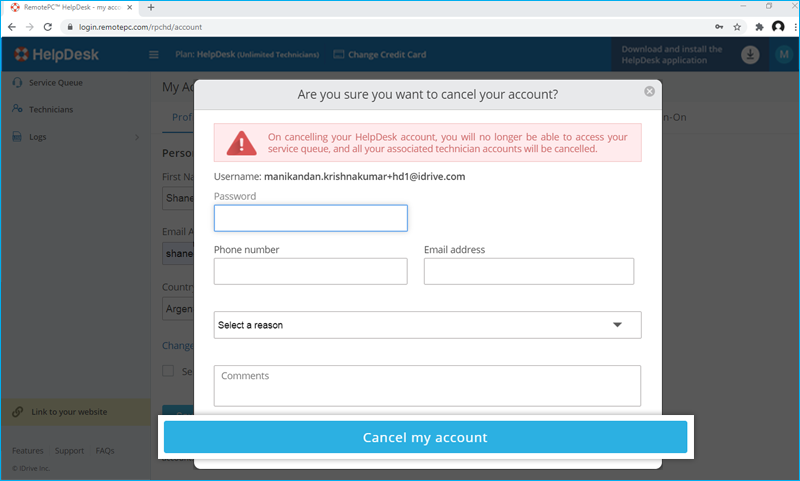
- Click 'Cancel my account' under 'Profile'. A pop-up appears to confirm your cancellation.
- 세부 정보를 입력하고 '내 계정 취소'를 클릭합니다.
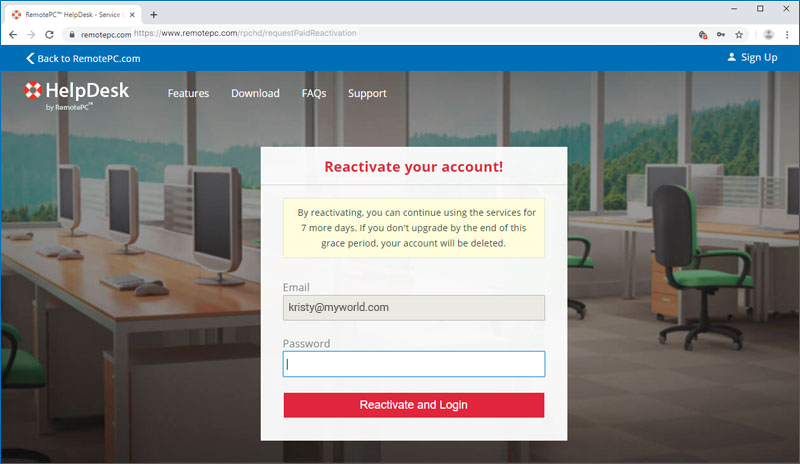
Once your account is cancelled and you try to login, you will get a message to reactivate your account on the login page. On clicking the link you will be directed to the reactivation page.
For free trial users,
Enter your password and click 'Reactivate and Login'. Your account gets reactivated and you get logged in to your account automatically.
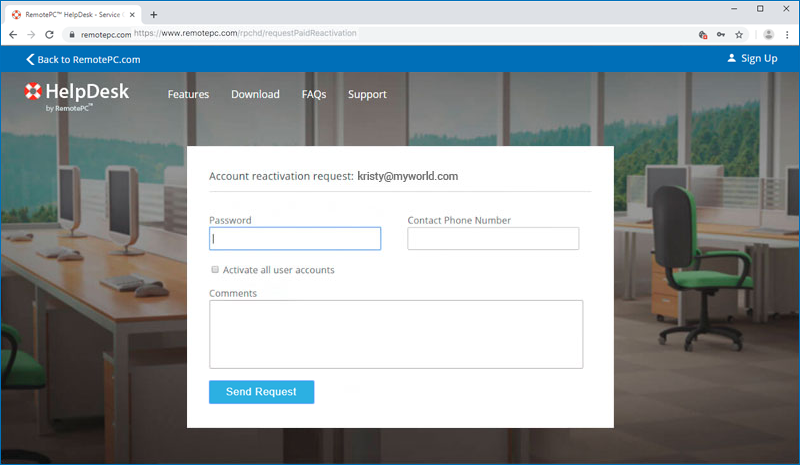
For paid users,
Enter your password and click 'Send Request'. Our support team will get back to you for the reactivation process.